> ## Documentation Index
> Fetch the complete documentation index at: https://docs.voucherify.io/llms.txt
> Use this file to discover all available pages before exploring further.
# Customer.io integration
> Learn how to integrate Voucherify with Customer.io to deliver personalized, cross-channel journeys and dynamically distribute voucher codes.
Customer.io is an AI-driven Customer Engagement Platform (CEP) that turns first-party data into personalized, cross-channel journeys. It unifies messaging, data routing, and analytics in one platform, allowing brands to deliver tailored, real-time communications.
## How does the integration work?
The most basic way to integrate Voucherify with Customer.io is through [webhooks](/api-reference/introduction-to-webhooks). Voucherify can send webhook events directly to Customer.io, which captures the data and uses it to create or update a customer profile with a custom attribute, for example, a voucher code.
Once the code is stored in the customer profile, it can be inserted into messages. Using Liquid, you can add the attribute to your message content so the code is dynamically filled in at send time.
## Scenario ideas
You can try these scenario ideas when using [Customer.io](http://customer.io/) and Voucherify.
When a customer completes their first order, renews a subscription, or abandons a cart, Customer.io can notify Voucherify to create a discount code and send it to them.
Customer.io segments, such as VIP customers or inactive users, can trigger specific Voucherify rewards like loyalty coupons or referral codes.
Voucherify generates individual codes for each customer that Customer.io inserts into messages. This prevents code reuse and keeps campaigns secure.
## Setting up the integration
This guide explains how to connect Voucherify and Customer.io. In this scenario, each time you publish a code in your Voucherify campaign, Voucherify posts a webhook to Customer.io. The webhook updates the customer’s profile in Customer.io with the code attribute. The Customer.io broadcast detects that the code exists in the customer’s profile, and sends the email – or any other type of message supported by Customer.io – containing the code to the customer. This completes the loop from publication in Voucherify to delivery in the customer’s inbox through Customer.io.
In [Customer.io](http://customer.io/):
1. [Create a new campaign](https://docs.customer.io/journeys/create-a-campaign/) from the **Campaigns** tab.
2. Choose a **Webhook** trigger.
3. Copy the webhook URL that Customer.io provides.
1. Create a [Discount coupons](/build/create-discount-coupons) campaign in Voucherify.
2. Provide a name, set the time frame, and define the discount value.
3. Save the campaign.
This campaign will be the source of the codes that you send to customers.
1. In the **Distributions** tab, create a new distribution.
2. Set the trigger to **Successfully published** and select the coupon campaign you created.
3. Select **Webhook** as the channel and paste the same Customer.io webhook URL.
4. Save the distribution.
This configuration ensures that publishing a code in the campaign sends a webhook to [Customer.io](http://customer.io/).
In Voucherify, you can configure different types of distribution triggers, such as custom events or segment-based rules. To explore all available options, read the article on [distributions](/integrations/distributions-overview).
1. Publish a code from the Voucherify campaign to a test customer.
2. The publish action triggers the distribution and posts a webhook to Customer.io.
3. In the Customer.io campaign workflow, confirm that a sample webhook was received.
4. Use the fields from this payload to update the customer profile.
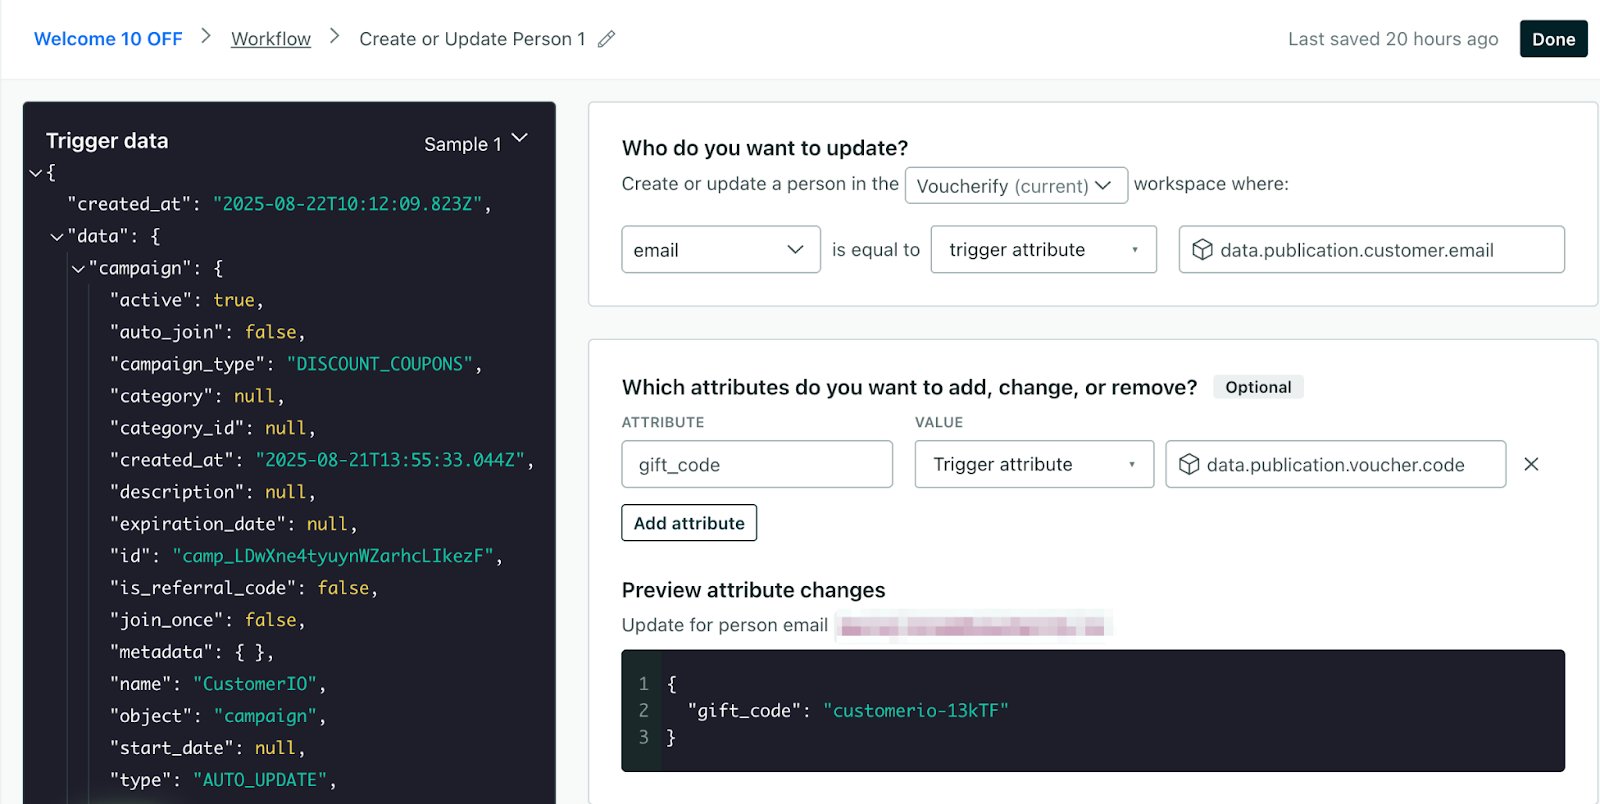
1. Add a **Create or Update Person** step after the webhook in your Customer.io workflow.
2. Use the webhook payload to identify the person and store the code.
3. Set the person identifier to the email from the payload using `{{data.publication.customer.email}}`.
4. Save the voucher code to a profile attribute, for example, `gift_code`, using `{{data.publication.voucher.code}}`. You can choose a different attribute name (such as `voucher_code`).
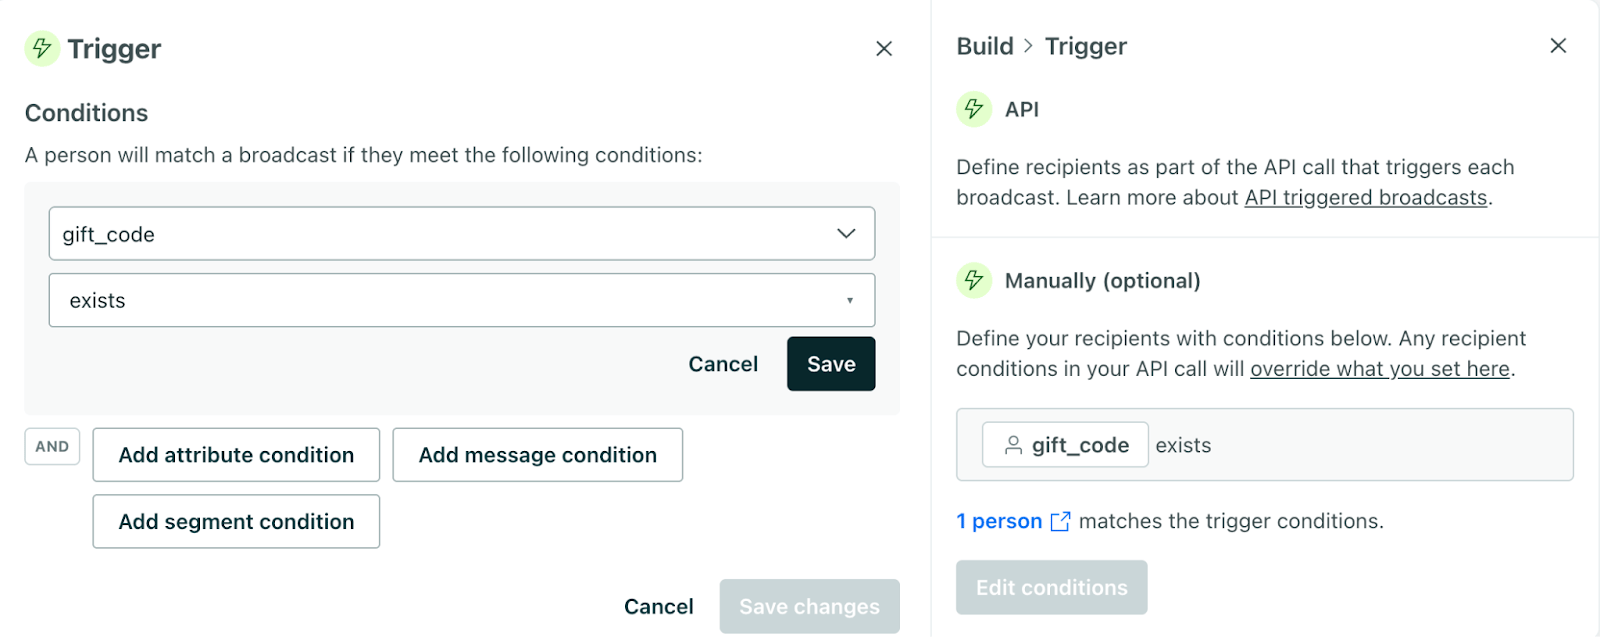
 1. Create a broadcast in Customer.io.
An API‑triggered broadcast works well for this flow, because it sends automatically when the code attribute appears in the profile.
2. Define a condition such as “`gift_code` exists” (or your chosen attribute name).
customer-io-define-broadcast.png
1. Create a broadcast in Customer.io.
An API‑triggered broadcast works well for this flow, because it sends automatically when the code attribute appears in the profile.
2. Define a condition such as “`gift_code` exists” (or your chosen attribute name).
customer-io-define-broadcast.png
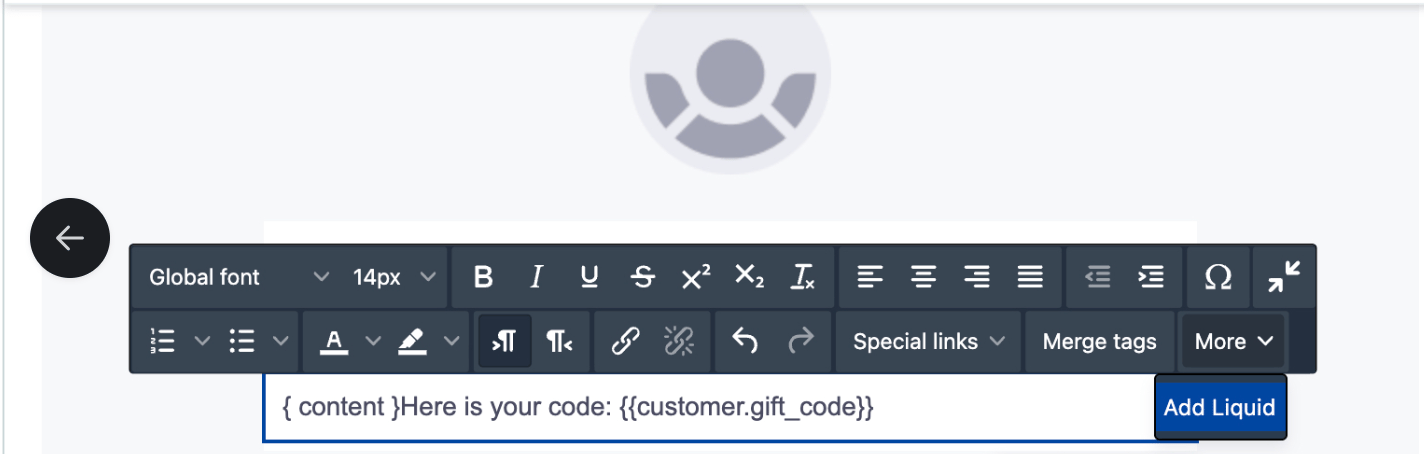
 3. Add **Email** as the messaging channel in the workflow and edit the message content. Insert Liquid to display the code stored on the profile:
```liquid theme={null}
Your gift code: {{customer.gift_code}}
```
3. Add **Email** as the messaging channel in the workflow and edit the message content. Insert Liquid to display the code stored on the profile:
```liquid theme={null}
Your gift code: {{customer.gift_code}}
```
 4. Once finished editing the message, you can start the broadcast.
Start the Customer.io campaign and the broadcast. Publish another test code in Voucherify to the same test customer. In Customer.io, verify that the person’s profile contains the code attribute and that the broadcast sent the email with the expected value.
This completes the loop from publication in Voucherify to delivery in the customer's inbox.
4. Once finished editing the message, you can start the broadcast.
Start the Customer.io campaign and the broadcast. Publish another test code in Voucherify to the same test customer. In Customer.io, verify that the person’s profile contains the code attribute and that the broadcast sent the email with the expected value.
This completes the loop from publication in Voucherify to delivery in the customer's inbox.